Inventory : Products / Master Data: Lots/Serial Numbers
Purpose
This document covers the Lots/Serial Numbers function in the Odoo 13 Inventory app. This tool is useful for tracking perishable inventory or assigning unique identifiers to produced goods.
Process
To get started, navigate to the Inventory app.
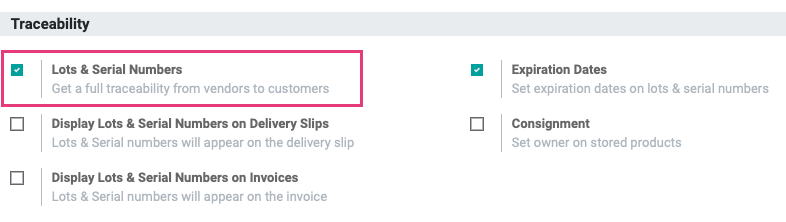
Once there, click Configuration > Settings from the top menu. Under Traceability, be sure Lots & Serial Numbers are enabled, as well as any other options. you require.
Note that once enabled, you also have the option to display these numbers on Delivery Slips and/or Invoices. Select any that apply.
When you're ready, click SAVE.
Product Settings
In order to assign Lots and Serial Numbers to products, you must designate a Traceability preference on the product. From the top menu, click Master Data > Products and navigate to the Storable product that you need to track, then click EDIT.
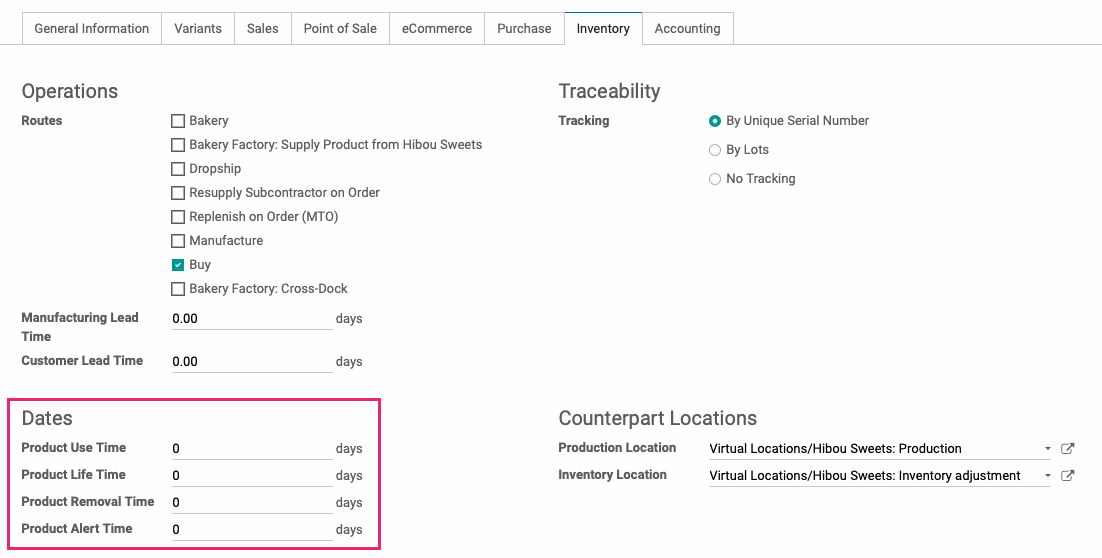
Under the Inventory tab, select the method of tracking for the product.
By Unique Serial Number: This method is used to track a single, unique product, such as a large kitchen appliance. Serial numbers are useful for warranty claims or after-sales services.
By Lots: This method is used to track several identical products packed together, such as fabric that was dyed in the same batch.
No Tracking: You can choose to disable tracking on products that are unlikely to be returned for production issues, such as paper towels.
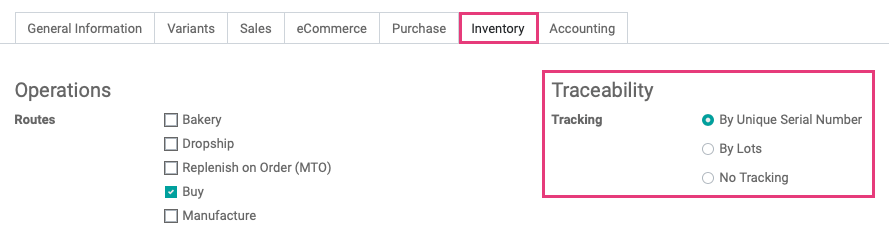
Selecting Unique Serial Number or Lots will display a Dates section under the Inventory tab allowing you to set several different fields relating to product expiration.
Good to Know!
If you change a product's Traceability when you already have product(s) in stock, you'll get the following warning:

Click OK to agree and continue. The last section on this page shows you how to manually add Lots/Serial Numbers to existing products.
When you're ready, click Save. Once saved, you will notice a new smart button called Lots/Serial Numbers at the top of the record. If you don't see it, it may be hidden under the More drop-down. Click this button to open a list of all Lots/Serial Numbers in production.

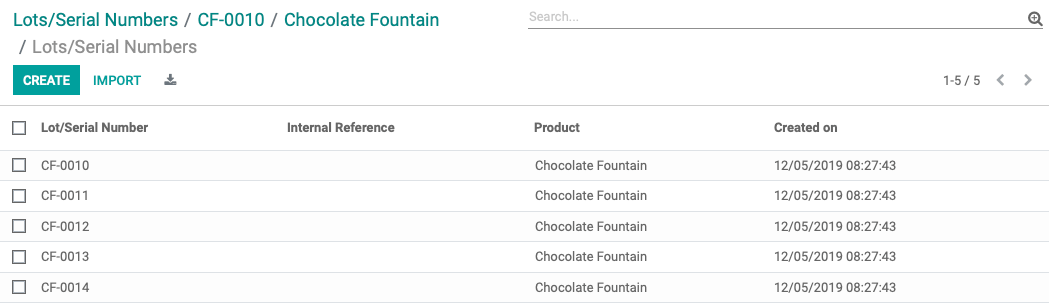
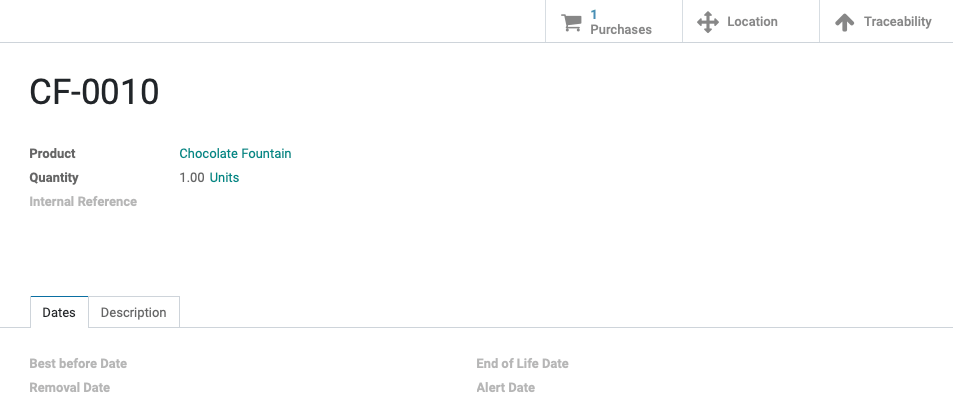
Click a record in the list, and you'll see the following information:
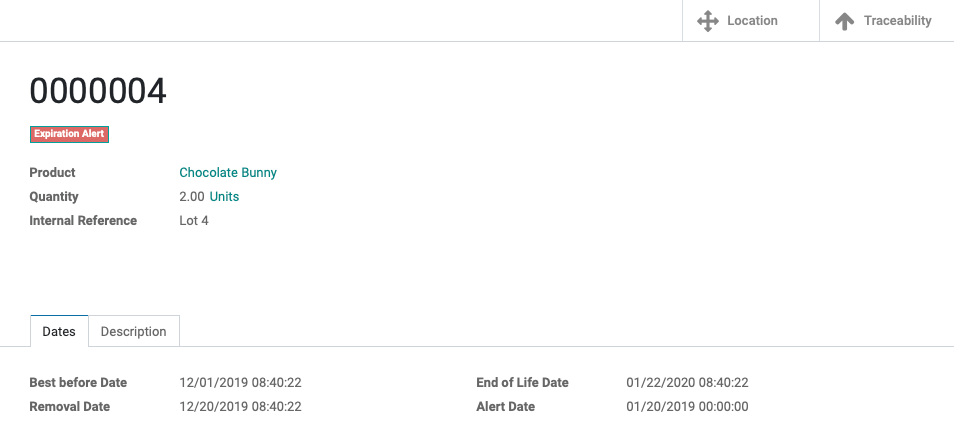
Lot/Serial Number: Will be entered during the receiving or manufacturing process.
Product: Choose the Product and/or Variant that you are tracking with this lot number.
Quantity: This will display the quantity of this lot/serial currently in stock.
Internal Reference: If entered upon receipt, this field displays the internal reference of the product for ease of filtering.
Dates Tab
If the Expiration is enabled in Inventory configuration, you'll also see the following:
Best Before Date: This is the date on which the goods with this Serial Number start deteriorating, but are not dangerous yet.
Removal Date: The date on which the goods will this Serial Number should be removed from stock.
End of Life Date: The date on which the goods will this Serial Number may become dangerous and should not be consumed or used.
Alert Date: The date used to determine when goods have expired using the filter "Expiration Alerts."
When an expiration alert is triggered, it will appear as a red badge on the lot template.
For more information on the use of lots/serial numbers within manufacturing operations, please refer to the Manufacturing: Lots/Serial Numbers documentation.
For more information on the use of lots/serial numbers within incoming and outgoing transfers, please refer to the Operations > Transfers documentation.
Adding a Lot/Serial Number to an Existing Product
As mentioned above, if you have existing inventory and change the Traceability to start tracking, you'll need to go in and manually add Lots/Serial Numbers to those products.
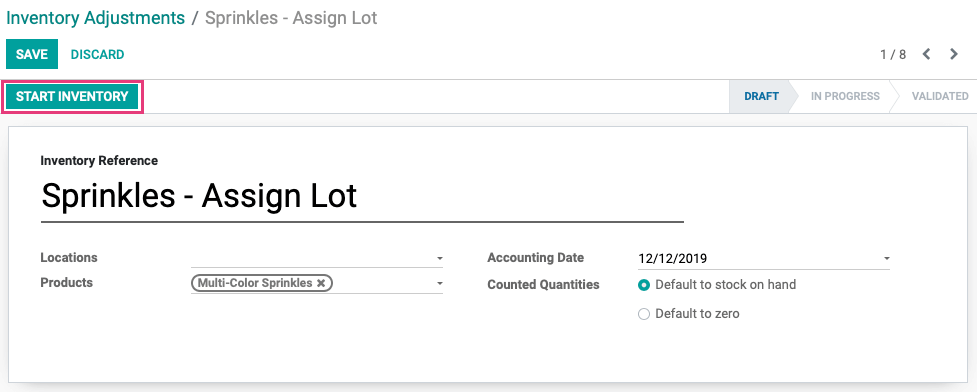
To do this, click Operations > Inventory Adjustments from the top menu. Once there, click Create and fill out the form.
Inventory Reference: The reason for your adjustment.
Locations: Select the warehouse locations affected by this adjustment, if applicable. For the purpose of adding traceablity, this field can be left blank.
Products: The product(s) you're adding traceability to.
Accounting Date: Enter the date of the change.
Counted Quantities: Leave this at Default to stock on hand since you're only adding a lot number and not product.
When you're ready, click START INVENTORY.
Click the Counted field for the current row and change it to 0, then click SAVE to save your record and remain on the same page.

Now click Create and add a new entry with the same information, but you'll add a lot number and set the Counted quantity to the number On Hand.
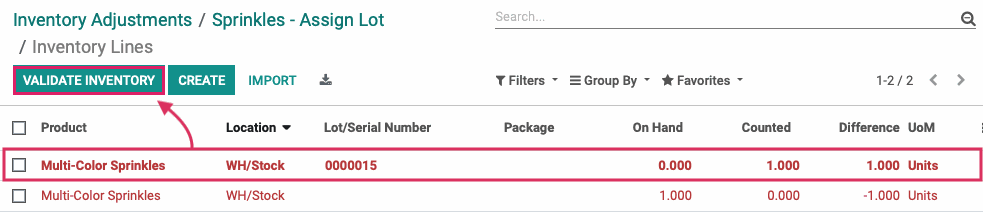
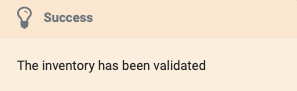
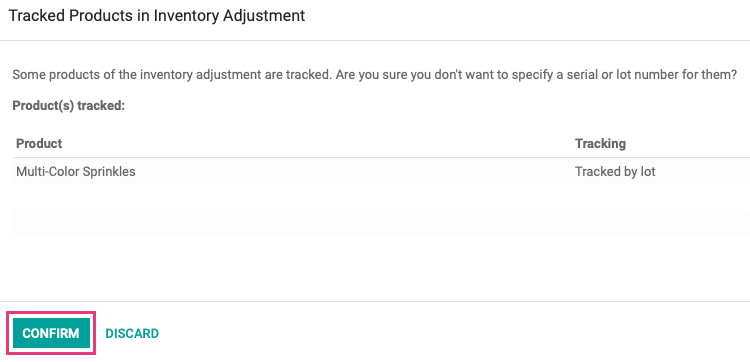
Click Validate Inventory to complete the adjustment. You'll see the following warning, and you can safely click Confirm as this was the reason for the adjustment.
You'll see a quick message flash that the adjustment has been verified. You've successfully assigned a Lot/Serial Number to an existing product!.